Overview
The MongoDB Ruby Driver is a library that allows Ruby applications to interact with MongoDB databases. You can use the Ruby driver to connect to MongoDB and perform common data operations. This guide shows you how to create an application that uses the Ruby driver to connect to a MongoDB cluster hosted on MongoDB Atlas and query data in your cluster.
Tip
MongoDB Atlas is a fully managed cloud database service that hosts your MongoDB deployments. You can create your own free (no credit card required) MongoDB Atlas deployment by following the steps in this guide.
If you prefer to use a different driver or programming language to connect to MongoDB, see our list of official drivers.
Note
If you run into issues getting started, ask for help in the MongoDB Community Forums or submit feedback by using the Rate this page tab on the right side of this page.
Download and Install
Install dependencies
Before you begin developing, ensure you install Ruby version 2.7 or later in your development environment. Ruby is pre-installed on macOS and some Linux distributions, but you might need to update your version.
Important
The Ruby driver is not officially supported on Windows.
Add the Ruby driver to your project
Open the quickstart.rb file and add the following code:
require 'bundler/inline' gemfile do source 'https://rubygems.org' gem 'mongo' end
This code adds the Ruby driver as a dependency by using the Bundler dependency management tool.
After you complete these steps, you have a new project directory with the driver dependencies installed.
Create a MongoDB Deployment
You can create a free tier MongoDB deployment on MongoDB Atlas to store and manage your data. MongoDB Atlas hosts and manages your MongoDB database in the cloud.
Create a free MongoDB deployment on Atlas
Complete the Get Started with Atlas guide to set up a new Atlas account and load sample data into a new free tier MongoDB deployment.
After you complete these steps, you have a new free tier MongoDB deployment on Atlas, database user credentials, and sample data loaded in your database.
Create a Connection String
You can connect to your MongoDB deployment by providing a connection URI, also called a connection string, which instructs the driver how to connect to a MongoDB deployment and how to behave while connected.
The connection string includes the hostname or IP address and port of your deployment, the authentication mechanism, user credentials when applicable, and connection options.
To learn how to connect to an instance or deployment not hosted on Atlas, see the Choose a Connection Target guide.
Find your MongoDB Atlas connection string
To retrieve your connection string for the deployment that you created in the previous step, log in to your Atlas account and navigate to the Clusters section. Then, click the Connect button for your new deployment.

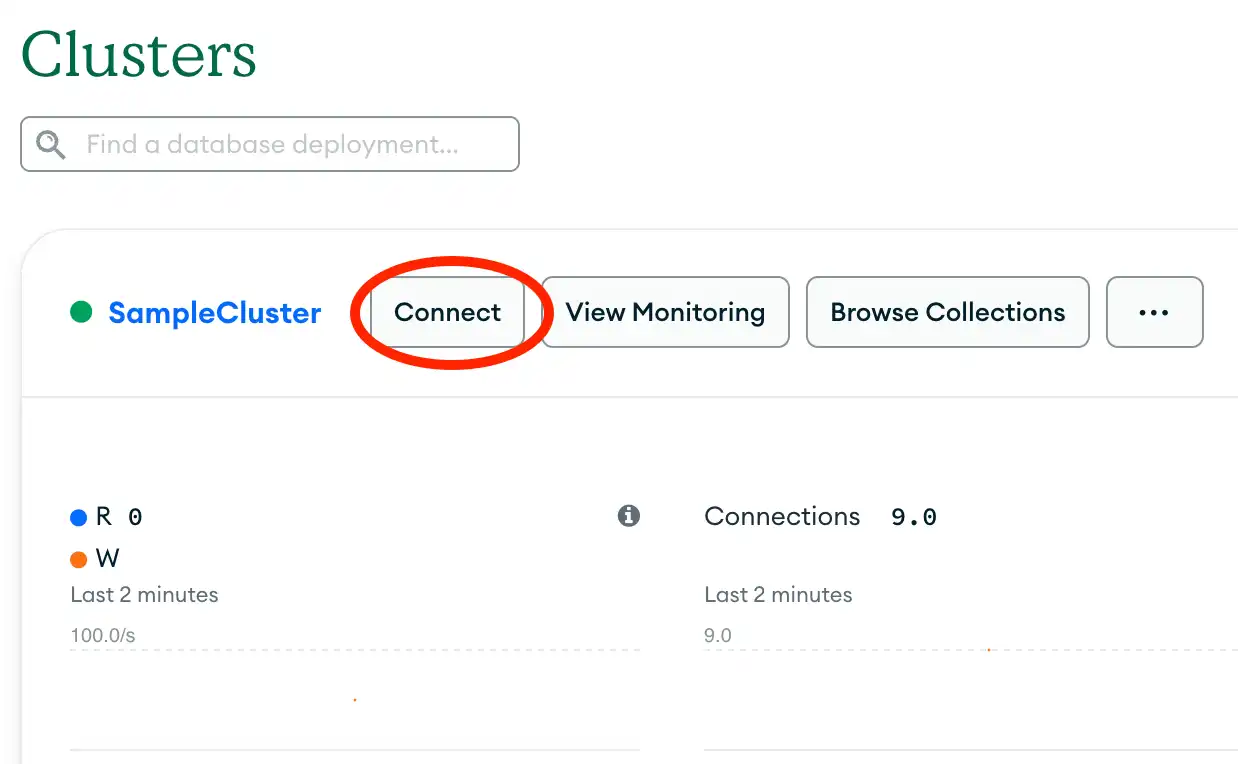
Proceed to the Connect your application section. Select "Ruby" from the Driver selection menu and the version that best matches your installed version from the Version selection menu.


After completing these steps, you have a connection string that contains your database username and password.
Connect to MongoDB
Edit your Ruby application file
Navigate to your quickstart.rb file in the ruby-quickstart
directory. Copy and paste the following code below the Bundler
code from the Download and Install step
of this tutorial. This code connects to MongoDB and queries the
movies collection in the sample_mflix database.
uri = '<connection string>' begin client = Mongo::Client.new(uri) database = client.use('sample_mflix') movies = database[:movies] # Queries for a movie that has the title 'Back to the Future' query = { title: 'Back to the Future' } movie = movies.find(query).first # Prints the movie document puts movie ensure client&.close end
Assign the connection string
Replace the <connection string> placeholder with the
connection string that you copied from the Create a Connection String
step of this tutorial.
Run your Ruby application
From your ruby-quickstart directory, run the following shell
command to run the application:
ruby quickstart.rb
The command line output contains details about the retrieved movie document:
{"_id"=>BSON::ObjectId('...'), "plot"=>"A young man is accidentally sent 30 years into the past in a time-traveling DeLorean invented by his friend, Dr. Emmett Brown, and must make sure his high-school-age parents unite in order to save his own existence.", ... "title"=>"Back to the Future", ...
If you encounter an error or see no output, ensure that you specified the
correct connection string in the quickstart.rb file and that you loaded the
sample data.
After you complete these steps, you have a working application that uses the driver to connect to your MongoDB deployment, runs a query on the sample data, and prints out the result.
Manage your Databases and Collections
You can learn how to use MongoDB databases and collections with Ruby driver.
MongoDB organizes data into a hierarchy of the following levels:
Databases: The top level of data organization in a MongoDB instance.
Collections: MongoDB stores documents in collections. They are analogous to tables in relational databases.
Documents: Contain literal data such as string, numbers, dates, and other embedded documents.
For more information about document field types and structure, see the Documents guide in the MongoDB Server manual.
Access a Database
Access a database by creating a Mongo::Client instance with the desired
database name.
The following example accesses a database named test_database:
client = Mongo::Client.new(['127.0.0.1:27017'], database: 'test_database') database = client.database
Access a Collection
Access a collection by using the [] method on an instance
of your database.
The following example accesses a collection named test_collection:
database = client.database collection = database['test_collection']
Tip
If the provided collection name does not already exist in the database, MongoDB implicitly creates the collection when you first insert data into it.
Create a Collection
While the Ruby driver for MongoDB does not have a direct create_collection
method, you can use the create method to create a collection with
specific options.
The following example creates a collection called example_collection with specific options:
database = client.database database[:example_collection].create(capped: true, size: 1024)
You can specify collection options such as maximum size, document validation rules, and others by passing them as arguments to the command method with the create command. For a full list of optional parameters, refer to the MongoDB documentation on the create command.
Get a List of Collections
You can query for a list of collections in a database by calling the collections
method. This method returns an array of collection objects in the database.
The following example calls the collections method and iterates over the array
to print the results:
database = client.database collection_list = database.collections collection_list.each do |collection| puts collection.name end
To query for only the names of the collections in the database, call the
collection_names method as follows:
database = client.database collection_names = database.collection_names collection_names.each do |name| puts name end
Note
The database.collections objects list provides more detailed information
(i.e. each collection object can be further queried for metadata), while
database.collection_names simply lists the collection names.
Delete a Collection
You can delete a collection from the database by using the drop method.
The following example deletes the test_collection collection:
database = client.database collection = database[:test_collection] collection.drop
Warning
Dropping a Collection Deletes All Data in the Collection
Dropping a collection from your database permanently deletes all documents and all indexes within that collection.
Drop a collection only if the data in it is no longer needed.
Configure Read and Write Operations
You can control how the driver routes read operations by setting a read preference. You can also control options for how the driver waits for acknowledgment of read and write operations on a replica set by setting a read concern and a write concern.
By default, databases inherit these settings from the Mongo::Client instance,
and collections inherit them from the database. However, you can change these
settings on your database or collection by using one of the following methods:
database.with: Gets the database and applies the new read preference, read concern, and write concern.collection.with: Gets the collection and applies the new read preference, read concern, and write concern.
To change read or write settings with the preceding methods, call the method and pass in the new read preference, read concern, or write concern.
The following example shows how to change the read preference, read concern, and
write preference of a database called test-database with the database.with
method:
database_with_settings = client.use('test_database').with( read: { mode: :secondary }, read_concern: { level: :local }, write: { w: :majority } )
The following example shows how to change the read preference, read concern, and write concern of a collection:
collection_with_settings = client[:test_collection].with( read: { mode: :secondary }, read_concern: { level: :local }, write: { w: :majority } )
To learn more about the read and write settings, see the following guides in the MongoDB Server manual:
Tag Sets
In MongoDB Server, you can apply key-value tags to replica set members according to any criteria you choose. You can then use those tags to target one or more members for a read operation.
By default, the MongoDB Ruby driver selects primary members for read operations. You can modify this behavior by setting read preferences and, optionally, tag sets.
In the following code example, the tag set passed to the :read parameter
instructs the Ruby driver to prefer reads from the New York data center
('dc':'ny') and to fall back to the San Francisco data center ('dc':'sf'):
client = Mongo::Client.new(['IP_ADDRESS_001:27017'], database: 'test', read: { mode: :secondary, tag_sets: [{'dc' => 'ny'}, {'dc' => 'sf'}] }) database = client.database collection = database[:example_collection]
To learn more about replica sets, see the the MongoDB Server manual Replica Set Members page.
Local Threshold
If multiple replica set members match the read preference and tag sets you specify, Ruby driver reads from the nearest replica set members of sharded clusters, chosen according to their ping time.
By default, the driver uses only those members whose ping times are within 15 milliseconds
of the nearest member for queries. To distribute reads between members with
higher latencies, pass the local_threshold option to the Mongo::Client constructor.
The following example specifies a local threshold of 35 milliseconds:
client = Mongo::Client.new( ['IP_ADDRESS_001:27017'], database: 'test_database', read: { mode: :secondary_preferred }, local_threshold: 35 ) database = client.database collection = database[:example_collection] result = collection.find({}).first puts result
In the preceding example, Ruby driver distributes reads between matching members within 35 milliseconds of the closest member's ping time.
Note
Ruby driver ignores the value of local_threshold when communicating with a
replica set through a mongos instance. In this case, use the
localThreshold
command-line option.
API Documentation
To learn more about any of the methods or types discussed in this guide, see the following API documentation:
Next Steps
Congratulations on completing the quick start tutorial!
In this tutorial, you created a Ruby application that connects to a MongoDB deployment hosted on MongoDB Atlas and retrieves a document that matches a query.
Learn more about the Ruby driver from the following resources:
Learn how to perform read operations in the Query Documents section.
Learn how to perform write operations in the Write Data to MongoDB section.